MegaHitch Lock: How It Works
Vault Adjustment and Installation Instructions
1. Two different length adjustment bolts are provided. The lock comes with an installed 21⁄2” long bolt and a 13⁄4” long bolt is shipped loose to cover all potential configurations.
2. Using the keys provided unlock the Coupler Vault. Remove the lid by using the two finger holes provided.
3. Unlock the trailer coupler. Place the Coupler Vault onto the trailer coupler allowing the bolt to act as a hitch ball. Place the lid back onto the Coupler Vault. The lid should be all the way down in the steel box. You should have zero clearance between the bottom of the lid and the top of the trailer coupler. If not, and lid is seated all the way into the box then remove the lid and adjust the carriage bolt up to a height that will provide zero clearance. If the lid does not seat all the way into the steel box then you will need to replace the 21⁄2” long bolt with the 13⁄4’ long bolt provided. Then make the same adjustments to achieve zero clearance. A wrench will need to be used to make adjustments.
4. After locating the correct height adjustment and the lid in the correct place push the lock button to lock the Coupler Vault in place. Lock the trailer coupler just as you would when hooked to a tow vehicle. Your trailer is now secure.
Maximum security is achieved by adjusting the carriage bolt up or down so that the Coupler Vault lid has zero clearance between the inside of the lid and the trailer coupler.

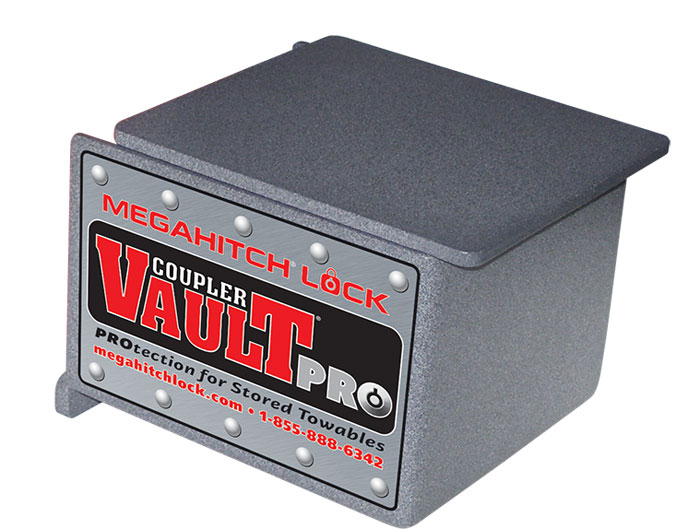
Above image is of the Coupler Vault Pro™design has a ball system built to fit in the coupler the same as the tow ball on your tow system. The adjustable hitch design provides stronger security. Made of high density acetate, the adjustable security ball adds a second layer of defense – even with the latch undone – the ball securely fits inside the socket.
The original Coupler Vault™ (photo below).